

How To Change A Fuel Filter
How to Supersede Your Car's Fuel Filter
When your vehicle needs a new fuel filter, relieve money by doing the job yourself. Here'due south how.
Introduction
Vehicle fuel systems accept several important components that keep engines purring. Replacing these components when needed tin can hateful the difference betwixt a smooth driving experience and being stranded on the side of the road. The fuel filter is one of these components.
Although a growing number of late–model vehicles no longer have accessible fuel filters, enough older models still do that they're worth knowing about. Designed to keep dirt, rust, paint fries and other fuel contaminants from entering fuel injectors and ultimately harming the engine, experts recommend replacing the fuel filter in your vehicle every ii years or thirty,000 miles. There is merely one fuel filter in your vehicle, and failure to change it tin lead to a breakup as insufficient fuel gets to the engine.
If you learn the steps of fuel filter replacement, yous can do this fast, economical DIY task adjacent time your vehicle needs a new fuel filter. Although details vary from i vehicle to another, the basic procedure is the same equally I have described here.
Price for parts = $15 to $125.
Price for professional labor = $30 to $100.
Time for DIY replacement = 15 to 60 minutes.
Tools Required
Materials Required
- Replacement fuel filter (must be correct size & type)
Project step-by-pace (5)
Step one
Relieve Fuel Pressure
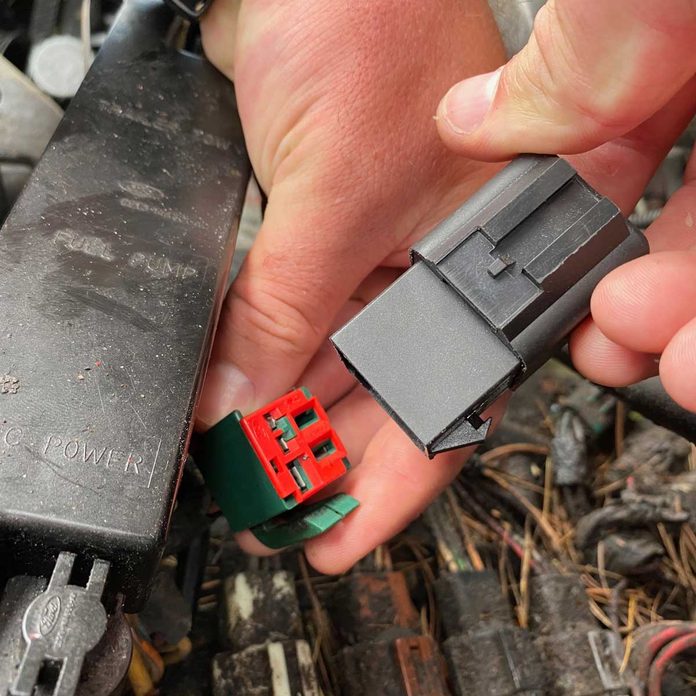
- To supplant a bad fuel filter, first locate the fuse or relay for your vehicle's fuel pump and unplug it.
- Try to start the vehicle. If you disconnected the correct excursion, the engine will plow over but not start. It might also beginning and run for a few seconds before dying.
- Shut off the engine and let it cool, if it has been running.
Step ii
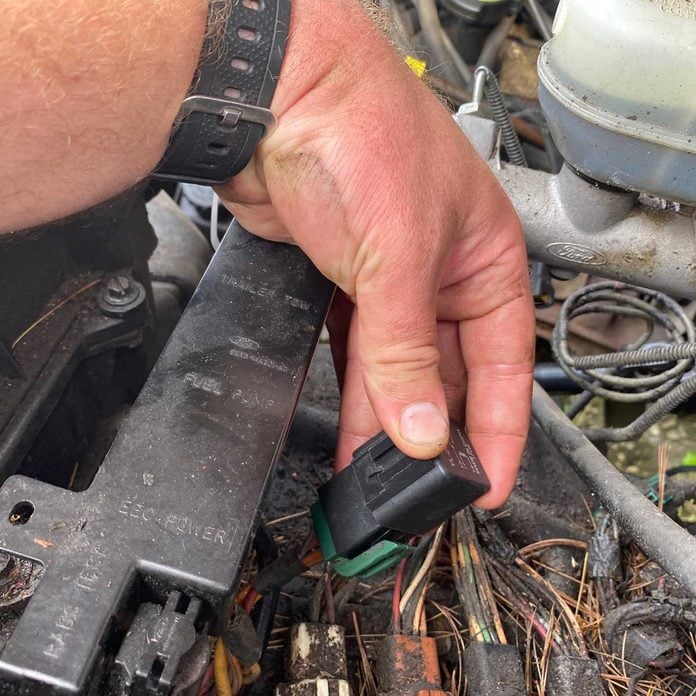
Find the Fuel Filter
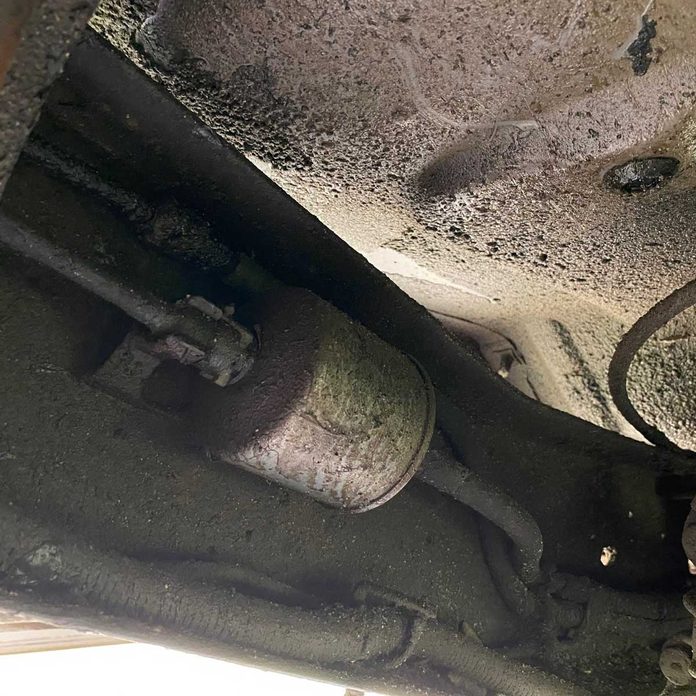
- Check an auto repair manual to locate your vehicle's fuel filter.
- Remove the replacement fuel filter from the box.
![]()
Step 3
Disconnect and Remove the Old Filter
- Connect your garden hose to the nearest water source, turn the h2o on at the source, then make sure the hose is within easy attain of the vehicle you're working on.
- Pro tip: There's a hazard a small amount of fuel will eject out of the lines when you disconnect the filter, and if whatever gets in your eyes you'll demand to wash it out correct away.
- Put on your safety glasses, then drive your vehicle upwards on ramps if your filter is housed underneath your vehicle and yous need actress clearance.
- Position your drain pan nether the filter.
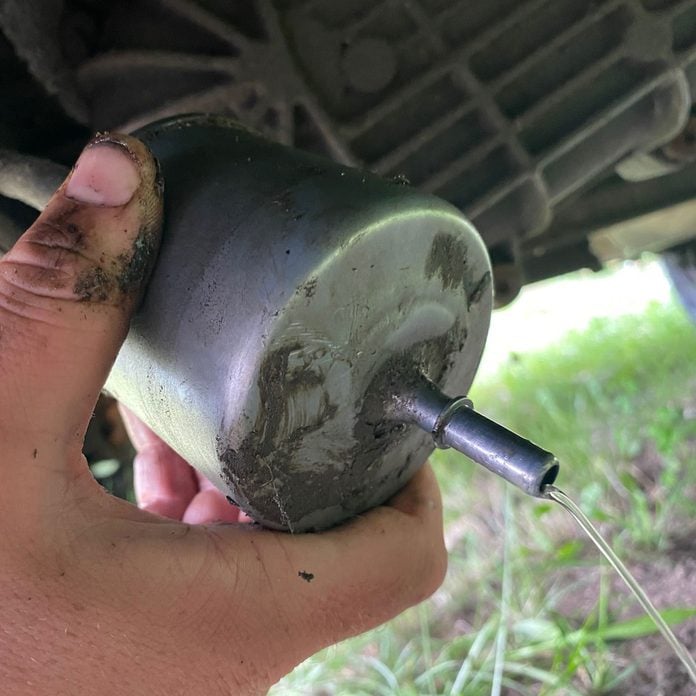
- Find, loosen and remove the fuel lines connected to either terminate of the filter.
- You may need to utilize pliers to remove retaining clips from the ends of the lines.
- Pro tip: Lookout man out for squirting gasoline and catch it in the drain pan, if necessary.
- You may need to utilize pliers to remove retaining clips from the ends of the lines.
- Loosen the screw clamp or bolts holding the fuel filter in position, and then remove the filter and place it to 1 side.
Step 4
Install the New Filter
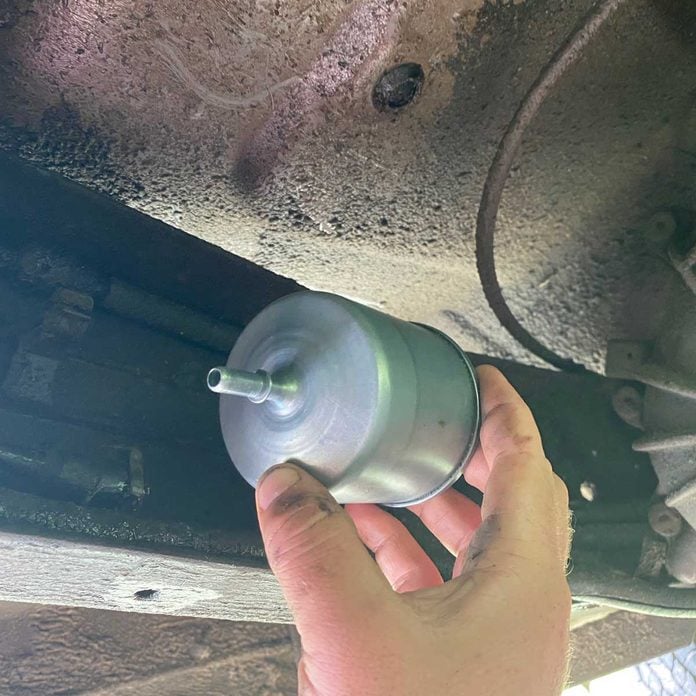
- Put the new filter in position, then tighten or clip it into identify.
- Pro tip: Make sure it's facing the correct manner because fuel is simply meant to catamenia one fashion through a filter. Look for an pointer on the filter body indicating direction of menses and orient the filter so the arrow points toward the engine.
- Connect the fuel lines to each end of the filter, then replace the retaining clips.
Step five
Reinstall the Fuse or Relay
- Reinstall the fuel pump fuse or relay that you disconnected earlier.
- Try starting the vehicle. If it runs normally and there's no fuel leaking from the new filter, the job is done.
Originally Published: Baronial 17, 2020

How To Change A Fuel Filter,
Source: https://www.familyhandyman.com/project/car-fuel-filter-replacement/
Posted by: blunthaideatel.blogspot.com
0 Response to "How To Change A Fuel Filter"
Post a Comment